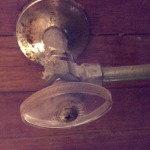
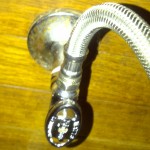
 I am no plumber, and I know my limitations. This was a project that I was pretty sure I could do. The valve failed, after 30 years, it was stuck in an ‘off’ position, and my toilet was getting no water flow into the tank. I tend to treat projects like this like a recipe, it’s just the feminine side of me I guess, but I usually make a list of what I’m going to need, and go through the various steps in my head before I ever start. I try to think of any ‘accidents’ that may occur, and prepare for them as well. I’m not a psychic though, and stuff happens that you don’t expect sometimes!
Your first step is to determine the type of valve you have so that you can get one just like it for your replacement. This sounds like a no-brainer, and perhaps for the more experienced plumber it is, but I was a little confused with all the options, female, male, compression, brass, plastic, etc. My best bet to get the perfect replacement was to remove the old one and take it with me to a plumbing/lumber store where I could get some knowledgeable assistance.
To remove the valve –
1. Assemble your tools
- Pipe wrench
- Crescent wrench or channel locks
- Teflon tape
- bowl and rags
Locate and turn off the water supply to your house. You do NOT want the water on while do this!
Turn off your Hot Water heater to be on the safe side.
Run your faucet to get most of the water out of the main.
2. Loosen the nut that holds the small supply line that goes from the valve to the bottom of your toilet tank. Mine was a rigid piece of copper pipe that pulled out. You may have a flexible connection that is a simple nut turn. Remove this connection to the tank.
3. Put your channel locks or your pipe wrench on the pipe that comes from the wall or floor. You will want to apply pressure so that this ‘nipple’ does not come loose from the main water pipe. That would create a problem that you probably don’t want to even imagine fixing.
4. Put your wrench on the nut and loosen the valve connection. It may be hard to turn and take quite a bit of pressure, be sure you’re keeping the opposite pressure on that nipple while turning. It’s easier than it sounds. Remove the valve.
5. Place your bowl or bucket under the open pipe stub (nipple) to catch the run off.
Take your old valve to the plumbing supply or lumber store to get a replacement. If you had a rigid pipe that went from the valve to your toilet tank, I HIGHLY recommend also getting a flexible connection to replace that.
Putting the valve on
1. If your nipple has threads on it, in order to make a good seal, you’ll need to wrap it with the teflon tape.
2. Using your fingers turn the valve onto the nipple as tightly as you can by hand. Finish tightening with your wrench.
3. Now is when that lovely flex connection comes in! No matter where the place to attach it ended up, you should be able to fasten it on! I fastened mine to the bottom of the stool first (you just tighten the nut on) and then attached it to the valve.
Wow – looks like it’s done!  Making sure the valve is in the OFF position (righty-tighty/lefty loosey), either have someone or do it yourself, turn the main water back on. Check for leaks. None? Yay! If you have one – you may have to repeat putting the valve on making sure you have that teflon tape on good to help make the seal. Turn the valve to the “On” position. You should hear water running in your stool. Let it fill, then flush. If it fills again, and still no leaks, consider yourself a Rock Star!